Status Admin
 Updated
by
Arianne G.
Updated
by
Arianne G.
Before you can use the Status Admin page, you need to turn on the Status administration application right in User Administration. Once the application right is turned on, you can find Status Admin under the Administration menu.
Status Admin allows you to control which statuses appear in the new Assignment Detail’s status tracker and Statuses card.
Access to the new Assignment Detail preview is controlled by preferences. To get access, please reach out to your customer success manager.
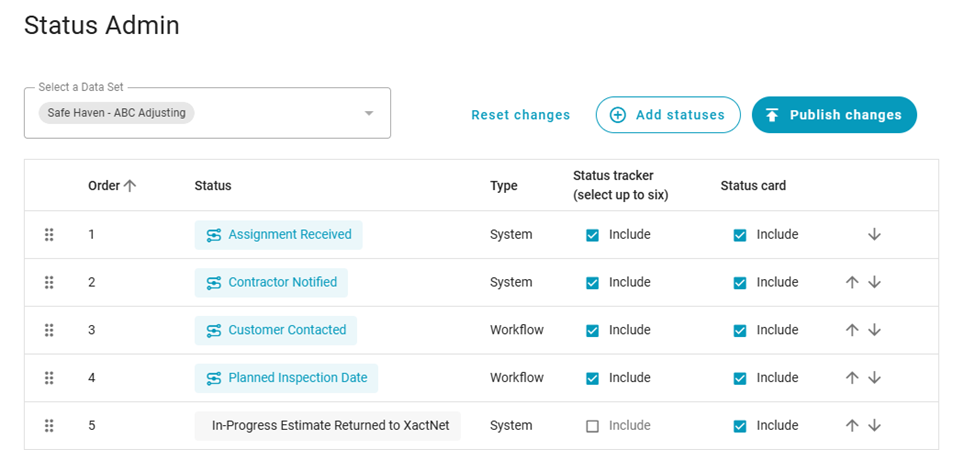
Select which statuses appear in the Statuses card
- Select Add statuses. The Enable statuses drawer opens.
- Select which statuses you would like visible and which you would like hidden.
Visible statuses appear in the new Assignment Detail preview. If a status is hidden, it won’t appear, but it will remain in the assignment data.
- Close the Enable statuses drawer.
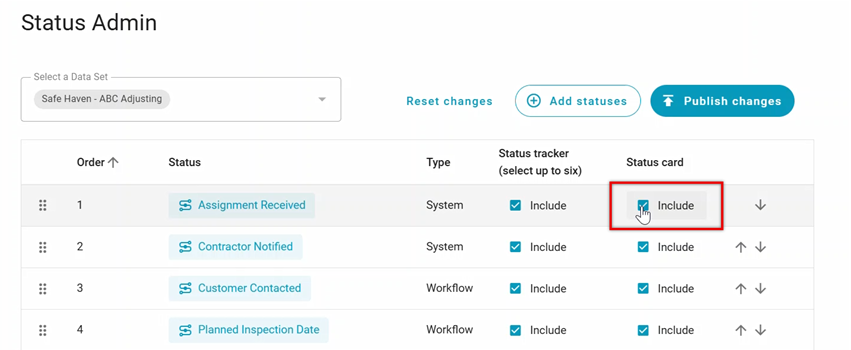
If you want to quickly remove a status from the new Assignment Detail page, you can deselect its checkbox in the Status card column. Please note that doing so automatically removes that status from the status tracker.
- Select the Publish changes button.
Customise the status tracker
You can select up to six statuses for the status tracker, and you can specify the order you’d like them to appear in.
- You can select up to six statuses for the status tracker. To include a status, select its Include checkbox in the Status tracker column.
If you don’t see a status that you want to include, it might be hidden! Follow the steps in the Select which statuses appear in the Statuses card section to make more statuses visible.
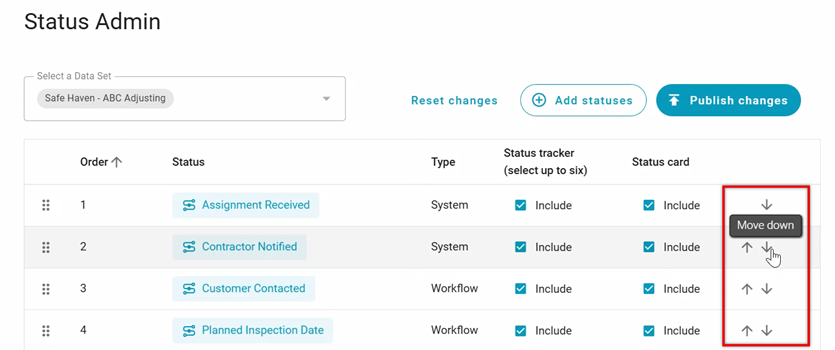
- You can see the order your statuses will be in by checking their number in the Order column. To change their order, use the Move up and Move down arrows.
- Once you’re done making your status tracker selections, click the Publish changes button.