Notification Rules
 Updated
by
Arianne G.
Updated
by
Arianne G.
In Notification Rules, adjusters and contractors (assignees) can instruct insurance companies (assignors) how and when to notify them when assignments are sent to them, action items are created for them, and flooring-analysis information is returned.
The screen shots in this document are generic, and your company’s interface may vary.
Related: Getting Started > How to set up notifications, Contact Methods, Personal Address Book, Personal Rules
Access and add notification rules
- Select Notification Rules from the Administration menu.
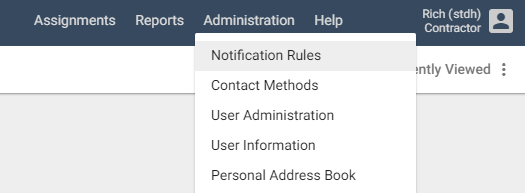
The Notification Rules page appears.
- Click Add New Notification. A row of menus appears. Select the appropriate descriptor in each category.
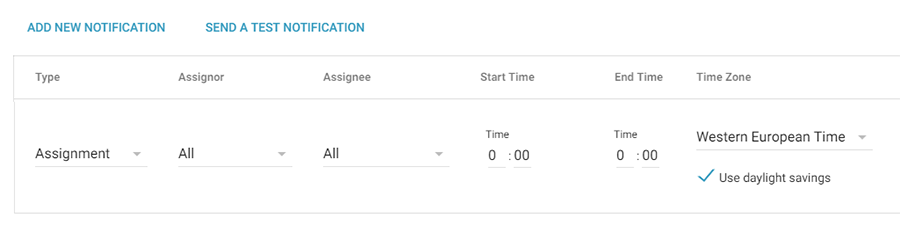
a. Select the Type of notification:
Assignment
To notify individuals when assignments are sent to them.
Action Item
To notify individuals when action items are created for them.
Flooring Analysis
To notify individuals when flooring analysis data is returned.
b. Select the Assignor (or the insurance company) to which this notification rule applies.
c. Select the Assignee (or the XactNet® address) to which you want this notification sent. If you want the notification sent to all XactNet addresses associated with your company, select All.
d. Select the hours of the day the assignee can receive notification. Leave the default of 00:00 to 00:00 to indicate any time of day.
e. Select the appropriate time zone for the assignee.
f. Select a language for the notification email.
g. Select the days of the week the assignee can receive notification. Selected days are highlighted in blue.
h. Select the level of assignment Priority needed to trigger a notification:
Emergency Assignments
To notify individuals when emergency assignments are sent to them.
Normal Assignments
To notify individuals when normal assignments are sent to them.
All Assignments
To notify individuals when all assignment types, both emergency and normal, are sent to them.
i. Select the Peril to which the notification rule applies.
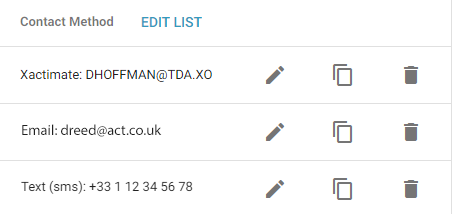
j. Select the Contact Method. See Edit the Contact Method list for more information.
- Click Save. The new notification rule appears on the Notification Rules page.
Edit, copy, and delete notification rules
- To edit a notification rule, click the Edit icon next to the notification rule you want to modify. A row of drop-down menus appears. Change the notification rule as needed. See Access and add notification rules for instruction.
- To copy a notification rule, click the Copy icon next to the notification rule you want to copy. A copy of the rule appears in a row of drop-down menus. Change the notification rule as needed. See Access and add notification rules for instruction.
- To delete a notification rule, click the Delete icon next to the notification rule you want removed. A confirmation dialogue box appears. Click OK.

Send a test notification
- Click Send a Test Notification. The Send Test Notification dialogue box appears.
- Select a Contact Method from the drop-down list.
- Click Send Notification.
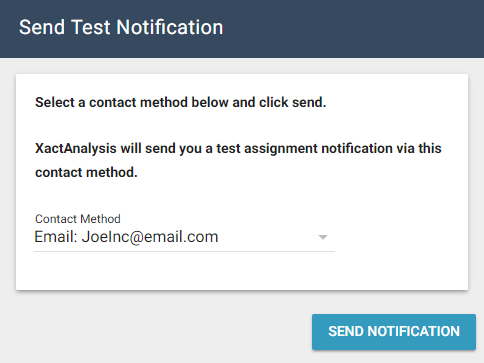
- A confirmation dialogue box appears and a notification is sent via the contact method. You may either click Back to send another test notification or click Close.
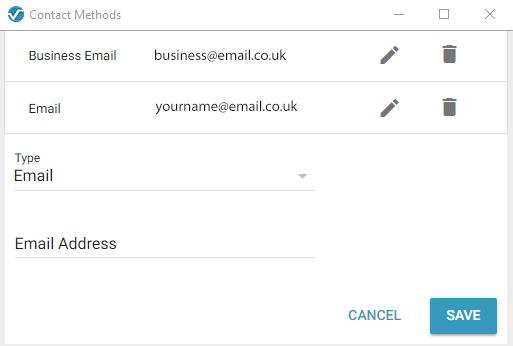
Edit the Contact Method list
- Click Edit List in the Contact Method column header. The Contact Methods dialogue box appears. For help with adding, editing, or deleting contact methods, see Contact Methods.